Tuesday, July 31, 2012

Christmas in July


Hi everyone, I have finally found my way back to blogland.  I have missed seeing all your wonderful creations and hope to catch up later this week.  Thanks for visiting while I have been away.  

These cards were made for the July Card Swap over at Craftmad.  We had to make two Christmas Cards and send them to our partners.  They then had the choice of keeping the cards or mailing them onto Tracey Hanshaw who is part of a team collecting Christmas Cards for Aussie Troops serving overseas so they can send them back home to their family and friends.  Details here.  You can see the other swap cards here in the Gallery at Craftmad.

For the card above I thought it was time to play with some Washi Tape that people have kindly sent me over time....one being Annmaree.
So started with a plain white base card and tore off different lengths of the pretty Washi Tape.  I then covered another piece of cardstock with matching Washi tape to be the backing for the stamped image. I then stamped the tree image from the Stampin Up set - Crazy for Christmas. Coloured all the stars yellow and added a touch of Kindy Glitz.  I have also coloured a couple of the trees with my grey Copic Pens and like the end result.  A happy mistake. Yes, I smudge one tree and had to cover up my mistake. :-)


I have noticed a few people visiting my blog in search of Embossing Foil which reminded me I had some in my stash still.  So decided on making a male style Christmas card.  I started with red Bazzill cardstock then a layer of Bazzill Patterned paper - Dino Mite.  I then ran the copper Embossing Foil through my Swiss Dots embossing folder and rubbed the dots lightly with an emery board.  Used my Spellbinder Circle dies to create the topper, stamped on a Stampin Up Dasher image in Staz On ink and added some wording from the Stampin Up Crazy for Christmas set to fill the gaps.  Finished with a black sentiment sticker from Sticker Store.

We are just getting ready to start our August swap at Craftmad.  We are busy deciding on the theme so come on over and join in the fun.  

Wishing you all a beautiful day.....the weather is perfect here, cool to start with but lovely blue skies and warmer during the day.

Wednesday, July 25, 2012

I am here ...... just busy


Just popped in to say hi! 
I am still around just been a tad busy.  Hubby and I flew to Brisbane on the weekend to meet up with our son.  It was time for him to find new accommodation so we helped him in his search and found a place that we all liked....but mainly our son liked.  :-)  So soon he will have a new place to call home.

This week I have been tad busy with thing here.   Bit of bookbinding and a little newspapering.
So I will return real soon.

Thursday, July 19, 2012

Weave Card


I have seen people adding weaved papers to their cards and thought it was time for me to have a try.  This is such a wonderful way to clear out some papers from your scrap box.
So I started with a white base card, then a layer of white card which I stitched around the edge of with my sewing machine.  Then I picked out some scraps of paper and cut a pennant shape in each end of most of the strips and then weaved away.  Finished with three red flowers layered up and some lovely suede like leaves that I have in my stash.  At the bottom of the card I added a Happy Birthday sticker.

This card was also created as Design Team card for Unstampabelles.  We are now halfway through our July CELEBRATIONS challenge and seeing some wonderful entries.  We just wanted to keep you inspired so that you take the chance to enter and be in the running for our two prizes this month.  Remember we also have blog candy to be won by one lucky follower who leaves a comment as to what was their favourite post over the past year.

I would like to share this card at 

Featured here on Inspire me Fridays.  Thanks Maria


Wednesday, July 18, 2012

Disappearing Nine Block and Frogs


This is the Disappearing Nine block that I made up for Cathy of Craftmad.  It was the last block that I sewed for our Craftmad Family Quilt.  We have started this month on swapping Churn Blocks for six month.  Each month we will have a new bright colour to use with our background black fabric.  I am really excited about this new quilt.  Hoping to get to it today.  Our colour this month is green and I have bought the fabric and rinsed it.  Just need to sit and cut the pieces and start sewing.  The other project I am trying to finish at the moment is my monthly doodle calendar page.  Day 18 of July and I haven't even started on July.  Finished colouring in June's last night although I have a few empty boxes on there.


Took these frog photos last week.  Our huge frog visitor returned two more nights you can see how big he is in this post here.  Sadly, he hasn't been showing up since about Wednesday last week.


This guy here on the old fluro light frame is our regular frog and only half the size of the guy above.  Every night as I take the dog out for his last walk of the night I check where this frog is sitting and make sure he is not ready to jump on me as I walk through the door below him.

Have a wonderful day.....I hope to find the time to finish off a few projects.


Tuesday, July 17, 2012

MIL Birthday Card


Hi everyone, last night we played Semi-finals for our Touch Footy game and I really think it was the best game we have played all season.  The team just clicked.  We are in the lowest division (the only way I can keep up) and it is quite often a lot of fun although some of the adults tend to forget and play for ship stations.  The team is a mixed team of females and males and also in this division a mixture of adults and kids.  At any time we are only meant to have two adults on the field out of six players and the adults aren't allowed to score.  We won which made the night even better.  So next week we should have a rest and then come back in a fortnights time.  

Card time.  I made this card for my MIL's birthday.  It does look a little washed out in the photo but I did like all the soft colours in real life.  I started with some Beige Textured Linen Card then a layer of Stampin Up Pink Pirouette.  The next layer is more of the beautiful Bazzill patterned paper from over at Blue Edge Crafts.  This one is called Wayfarer.  I added some paper flowers with brad centres.  A gold sticker sentiment and a stamped bird image which I raised up on 3D Foam Tape.  The large flower I made with my new Simply Scored tool from Stampin Up.  I have made one of these flowers before and remember how uneven it folded up but with the with my Simply Scored tool and all the embossing lines already measured out it made everything so neat and easy.  Need to find more projects to use this on.  To finish the card I dug out a couple of my circle Spellbinders and made a couple of layers and added the pearl brad to the centre.

Have a terrific day.

Monday, July 16, 2012

Mareeba Rodeo


Morning everyone, hope you had a great weekend.  We did.  We drove up to Mareeba on the Atherton Tablelands to check out the Mareeba Rodeo.  In all my years living in the Cairns area I have never been before.  It was cloudy when we left home but we had checked the weather radar and it looked clear.  So off we went, get to Cairns and the lightest shower starts, head up the Kuranda range and the clouds are low and it is now light rain.  We should never have doubted it though as the closer we got to Mareeba the dryer it was.  As you can in the photo above it was till cloudy to start with.  Mareeba is known for being dry even though it is just over a 1/2 hour drive from Cairns.  One of it's claim to fame is 300 dry days.  I ended up sunburnt with a red face and red neck.  So glad I wore long sleeves and jeans.  Now to the photos.  The photo above shows one lane of the sideshow alley...this is at 9.30 in the morning so not busy at all.


The clowns were there keeping us amused with their simple humour that managed to get a smile and a clap from the crowd.


This was one of the horses from the bareback riding.  The cowboy is back over near the blue gate at number 6.  These guys are just rounding this bucking horse up, firstly to remove the strap near his hind legs and then to guide him out of the arena.


Here are some cowboys getting a ride for their money.


Can't believe how far back they lean.  Took me a while to adjust as I have watched Rodeo's on TV and they don't really show you any bad bits.  When first rider came out and off his horse I suddenly remembered this is real life and we may see someone seriously hurt.  Thankfully, not.  We did see a couple injured as their did not come undone or when they came off the bull or horse they ended up on the ground and copped a bit of a boot but all of them got up and walked away.


This young girl and the horse were amazing in the Under 11yo Barrel riding.


This little was just too cute in the Under 8 yo Barrel riding.  See Dad is leading out the horse and Mum is running beside making sure her daughter doesn't fall.


I thought the riders were amazing and gutsy each ride.  But it was the guys on the ground that were there to distract the bull or horse away from the fallen rider that amazed me. 


We got to see some woodchopping which is such a dying art.  Sadly.  The majority of guys we saw competing were in their 60's.  I doubt there would have been anyone under 50 on the day.  Now this guy was incredibly strong.  The first wood chop we watched he had a 26 second handicap and blitz the rest of the crew.  For this wood chop he had a 30 second handicap but sadly didn't finish as the block of wood had a black piece in the middle and if he had continued it would have ruined his axe apparently.


This is photo shows half of the stands at the rodeo.


Now this guy caught my eye.  I think he takes colour coordination just a tad too far.
Orange hair teamed with a brown leather hat, orange shirt and yellow shorts.  Luckily, he must have thought to add sunscreen otherwise he could have been red like me to finish off the ensemble.

Time to get moving and hang some clothes on the line. Have a great day everyone.


Sunday, July 15, 2012

Friday, July 13, 2012

Thank You Daffodils


Friday morning, another week done and dusted. Wow!

I finally finished off the Thank You cards for our Relay for Life team to send out to our prize donors.  These two were left to last as I had run out of Express It card stock.....still have to order some.  The last two daffodils, image from Ruth over at A Passion for Stamps, I have paper pieced.  I printed the image out twice on to two different sheets of Stampin Up patterned papers.

I used yellow card stock that I had cut down to card size ages ago.  Yellow is not a colour I normally use....so nice to reduce what I have.  Next I used my new Patterned Designer Series - Subtles Collection from Stampin Up.  I just cut strips from the two purple sheets and mixed and matched the front and reverse sides.   Finished the card with my Just Rite stamps and new to me Stampin Up Shimmery White cardstock.  I love the flecks of shimmer in the card....really finished the tag off nicely.


Have a lovely weekend everyone, I will see you all Monday.  Gardening is high on our agenda this weekend and if the rain holds off weed kill. evil laugh.

Thursday, July 12, 2012

Pillowcases for Oncology Kids


Morning everyone, thanks so much for your lovely wishes.  Hubby and I enjoyed a very yummy Chinese meal at the Golden Boat Chinese Restaurant last night.  Now we start on the next 25 year adventure.

Today, I am sharing with you two pillowcases that I made for a wonderful group that collects pillowcases and sends them Australia wide to all the kids in Oncology units of hospitals.  A little way to brighten their days.  This fantastic idea was started by 15 yo Brittany and you can find out more if you visit their Facebook page here.

Shamefully, I am a little slow with this project as this was our swap over at Craftmad for May.  Life has  been on fast forward for a while now and I never got to it.  I wanted to use up some of the fabrics in my collection and found this great Fat Quarter Pillowcase tutorial.  Mainly for the measurements. 

Enjoy your Thursday

Wednesday, July 11, 2012

25th Anniversary


Unbelievable but 25 years ago today we said 'I do'.

Like everyone else we have had our ups and downs but are still here today and love being part of a couple.  25 years of smiling, talking, letter writing, phone calls, texting, babies, toddlers, teenagers, young adults, tears, terse words, hand holding, travelling, puppy, fish, birds, bike riding, crafting, family, friends and yes, the occasional kiss. :-)

Tried to keep the card simple and not to flowery since I was giving it to my hubby.
Started with silver corrugated card for the base card.  Then a layer of this beautiful gold and silver paper which I think I received in a swap.  I couldn't find an appropriate digital image to colour so thought why not just use our image.  The photo corner is a chipboard shape I covered in glitter paper.  Silver sticker sentiment and a lovely charm I have also received in a swap.

Have a lovely day everyone.

Tuesday, July 10, 2012

Best Wishes, Scallops, Flowers and Buttons


I made this card for my June Swap card over at Craftmad.
We had to swap two card using the following items:
Flowers, Scallops and Buttons.
You will find my other card here.

I started this card with a lovely laser cut card blank, new to Blue Edge Crafts.
Then I had a play with some new Bazzill patterned papers called Vintage Marketplace.  I really like the feel and texture of this paper.  Also like the fact it is reversible so it is easy to create a card as you know the colours and patterns will work together.  I add a piece of butterfly ribbon (Mei Flower) across one of the joins.  Added gold sticker border and sentiment and finished with buttons from my stash.

The rain has set in today.....great for the gardens.
Wishing you all a terrific day.

Monday, July 9, 2012

Frog, Wedding Favours and the Happy Couple


Hi everyone, a bit of drizzly rain here this morning.  Good weather for tidying up after our weekend.
Saturday morning was spent at the markets with a book stall and my cards.  I sold 4 cards, happy.
Sunday morning we had this frog visitor on one of the chairs on our back verandah.  Our daughter has taken the first photo of him resting on our chair.  She has added her artistic flair to the photo....framing it and ageing it.


I moved the frog later in the day.  Normally, I am quite happy to pick up frogs but this guy was so large that I carried him over to the garden on the chair and slightly prodded him off with a stick.  My hubby took these two photos.  First one has his hand in it to show how large he was.


Doesn't he look quite content.

Now onto the remainder of Sunday.  Their are a group of six of us that have known each other a rather long time.....school friends and one lady joined in a couple of years later a work colleague.  One of our group of ladies now lives in New Zealand and has done for 15 years.  On the 9th of June her and her partner eloped.  So us here in Australia thought it only fitting that we should hold a wedding reception for them.  We all dug around in our wardrobes or visited Lifeline to find an appropriate formal style dress.  We all ended up in Regal coloured dresses, maroon, royal blue, wine coloured, black with beautiful floral prints.

I decorated up two tables with tablecloths, bead pearls, two vases of maroon coloured leaves and ferns, plates and cutlery.  Photo didn't turn out.  I also made some Wedding Favours that worked as Place Cards.  I found a wonderful tutorial here to make these twisted wedding favours.  I cut thick white paper to the size of my Victoria embossing folder.  Allowing an extra 1/2cm on three edges for the sewn seam.  I cut strips of maroon and blue ribbon to go with the dresses we were all wearing.  Then printed out names on the computer and attached that as a tag on top of the ribbon.

Now our friend is married she has decided to have a hyphenated surname, keeping her name and adding his.  The initial letter for both of their surnames is 'M'.  So I now see her as Mrs M & M hence the filling of the Wedding Favours.


I used the sewing machine to sew all the sides together.


I did take a shot of my decorated table but with all the white it did not focus properly.
This is a shot of the finished wedding favour.


This is our proxy couple.  Our daughter drew a cartoon interpretation of the couple.  Both are a little  older in real life and a little taller but it was nice to have them present. :-)


Both the Wedding Favours and the hand drawn couple would be perfect entries for our CELEBRATIONS challenge over at Unstamapabelles.
Be sure to check out the challenge as this month we have two prizes up for grabs and some blog candy.

I would like to share this post at 

Friday, July 6, 2012

Craftmad Family Quilt


Over at Craftmad we started sewing quilt blocks.....for a lot of us it was the first time we had ever done such a thing.  We decided when we had enough blocks it would be a Craftmad Family Quilt.  So from January to May we made up a different block each month in our partners favourite colours.  The above quilt block is a pinwheel block which I really enjoyed doing.  This headed off to Mandy who loves her blues.  Such a learning curve as I was setting up the swaps and as I never sewn a block before I just randomly picked that we should make 9 1/2 inch blocks.  So each month we all struggled with converting measurements so our block patterns would end up that size.  I also learnt that some of the more complex looking blocks are fairly simple.  It's a matter of starting with squares, sewing them together, then cutting them and rearranging to get a totally different pattern and resewing.


This is a photo of all the blocks I received plus a few of my practise blocks and mistakes (wrong size).
I have laid these out randomly for the photo.  We had a break during June to (optimistically) complete out Quilt. :-)  I do still  plan to get this done in the very near future.  Was thinking I might buy a maroon or pink colour fabric to tie all the blocks together.  Does anyone have any suggestions??? 

Over at Craftmad we are starting up a new lot of Quilt Block swapping.
Our plan for the new swaps is to stick to one block pattern for the next six months.  Each month do a different colour of the rainbow.  The blocks will be 12".  At this stage we are deciding on the block pattern and the background colour (black or white) and if we are doing brights or pastels.  If you would like to be involved please click here for more details.  We have a mixture of sewing levels involved....the main objective fun and learning.

Well that is me for this week.  Wishing you all a great weekend and I will see you Monday.

Thursday, July 5, 2012

3D Paper Tole Christmas Cards


Hi everyone, yes I have been missing in action again.  My daughter has been childminding over her school holidays, today is the last day.  It has meant an early start for both of us getting out of the house before 8am.  Then when I return home I am doing things around the house and not getting in here to post.  Today, I am changing my routine. :-)  A chilly start we have had to the day too.  It was 9C when I left home but when I returned 1/2 hour later it had warmed to 15C.  The days are beautiful though....blue skies and sunshine.

Today I thought I would share the remainder of the 3D Paper Tole cards I have made up to send off to Tracey Hanshaw who collects handmade cards for Aussie Troops serving overseas.  So they can then send them back home to their family and friends at Christmas time.  Details are here.

All the 3D Paper Toles and base cards have come from Blue Edge Crafts and stickers are from Sticker Store.  The background of these blue birds I have used my Swiss Dots embossing folder and sprayed on some gold smooch which does look much nicer and glimmery in real life.

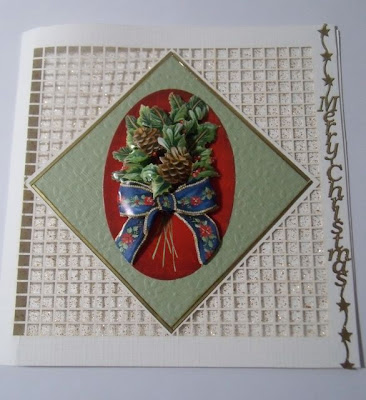
I just love these laser cut cards from Blue Edge Crafts.....such fin detail.  Behind the grid I attached some gold flecked fabric that I have had for ages.  You can see it better in the photo below.


 I must admit I do like my traditional colours for Christmas.  I have used my Victoria embossing folder here on green Linen Textured cardstock.  The sentiment was from a magazine giveaway.

I have used my Herringbone embossing folder for this card and a rub on sentiment.

 This paper tole I have had cut out for ages and never could find the right background or colours for it.  I persisted though and really like the end result.  This embossing folder actually has a frame in the centre which I have covered with the paper tole topper. I am not sure of the embossing folder name but it is new for me and sure to be a favourite.  I like the framed edge of it.  The sentiment is a rub on.

Well I hope your day is beautiful where ever you are.  Thanks for visiting and I hope to catch up with you tomorrow.

Monday, July 2, 2012

Unstampabelles Challenge #13 - Celebrations

We are celebrating our one year Blogaversary over at Unstampabelles.

There is Blog Candy on offer to help celebrate.  One lucky Unstampabelles Follower will be the winner of these goodies.  So visit here for further details.


As well as the candy we have a terrific prize donated to us from Cairns Bookbinders.
Prize:- handmade A5 journal and three lengths of ribbon.


Appropriately our theme this month for the Unstampabelles challenge is CELEBRATIONS.

For my Design Team card I found a wonderful tutorial for a star card over at Night Owl Designs and thought I just have to have a go.  I used Bazzill cardstock and new Bazzill Patterned Papers - Avalon all available at Blue Edge Crafts.  The sentiments are stickers from the Sticker Store.  I was surprised at how easy this card came together and had a wonderful time decorating it.
  
This is the inside of the card which I added more stickers and yes, it does fold back into that star shape.

I would like to enter this card into the following challenges:


LinkWithin

Related Posts with Thumbnails