Monday, February 28, 2011

Birthday Cake Slider Card


I made this card for my friends daughter who turned '9' last Tuesday.
When I made the slider card for my nephew's 18th birthday here.....I decided to google and see what everyone else does with slider cards.  Discovered this slider card at Stamper on the Store.  Sandra had a template for sale so I just had to give it a try.
Sorry about the photos but this was taken late afternoon on a rainy day.
I have used Stampin Up paper and card.
I embossed the icing with my 'Victoria' embossing folder.
Cut strips for the candles and free hand cut the flames.
Above is a photo of the cake collapsed to a size to fit into an envelope.


And here the I have pulled the cake out to it's full size.

When my friends daughter pulled it out of the envelope she pulled it out backwards and all collapsed and she was trying to figure it all out.  The expression on her face was brilliant when I turned it around and showed her it was actually a three tier cake.

Happy Monday everyone.

Saturday, February 26, 2011

What are my followers working on today?

Saw this fun post over at Thearica's Pigtales and Quilts.  So thought I would share what I am up to today and would love to hear what you are all working on.

At this very moment I am trying to catch up on everyone's terrific creations in blog land.  I have missed seeing people on my blog list for a couple of days.  Amazing how quickly time gets away.  I am doing this while counting down the minutes before I go and join a friend at our friend Ruth's Stampin Up fundraiser for cyclone Yasi.  Yes, I will be with other cardmakers...chatting and hopefully making some cards most of the day. :-)

So what project are you working on?

Friday, February 25, 2011

Slider Card


Well it is a tad wet here in the north.  This report says between 50mm to 250mm since 9am yesterday.  Not sure where that 50mm is as everywhere here would be 250mm I am sure. 
Everything is fine...just have that wet feeling.  I know some kids will be happy as they are flooded in just up the road at Peets Bridge.  Our son did well with his driving yesterday and was very 'chuffed' with himself.  Said he got nothing wrong.  Learnt how to parallel park and got it right each time.  Yes, he did put the wipers on a couple times by mistake. :-) Afterwards we went for a drive into Cairns in the heaviest downpour ever.  Nerve wracking for me but great experience for him as at this time of it is pretty normal.  So wipers were on full speed and me constantly saying 'drive slower in the rain', 'you don't have to go the speed limit'.  Oh the joys.

I have made this fun card for my wonderful nephew who turns 18 this Sunday.  18 :-0......time sure flies. Well in Australia, 18 is the legal age to vote....but I am thinking that is not why he is so excited as it is also the legal age to drink.  :-)  Yes, he has plans to go down to the pub when it opens and buy a beer because he can then return home to a small party with mates.

So when I saw the Slider Cards that everyone had made in the last Craftmad and Create and Chat night (check the cards here)  this idea popped into my head.
I found a picture of beer bottles all lined up on a wall...printed it out and then added a piece of textured paper which I have run through the cuttlebug with my 'Branches' embossing folder.  Added the plaid sticker to the join area hoping it looks like the bar top.
I then printed out a beer bottle onto photo paper and cut it out.
Followed these instructions on making a Slider Card over at Craftmad
Hard to see in the photo but there is ribbon out each side of the card..you pull on these the beer bottle actually moves up and down the bar.
Finished with these stickers from Sticker Store.

I would like to enter this card into the following challenges.


Thursday, February 24, 2011

Happy Birthday Dad - Wallet Card


Morning everyone, a very wet morning here today.  Our son's first ever driving lesson too with an instructor.  Which on one hand is a good thing as our indicator and wiper are on opposite sides to normal cars....so now he won't feel silly turning the wipers on instead of the indicator. :-)  But rain first day with someone different in the car might make him a little more nervous...different things to think of.  

Now this card I made for my Dad whose birthday was on Tuesday 22nd Feb.  This is such a fantastic day that I know of three other people born that day.  One of those also shares his birthday with his Grandfather and there were three other babies born the same day as him.  Mentioned this to my friends and one said she also had two friends birthdays that day and another friend also had a friend sharing that date.  I was blog hopping this morning and came across a 13yo crafter whose Mum also shares the date.
So that is 12 people that I know of amazing hey!

I made this wallet card which was a version of the Handbag Album that was made on the last Create and Chat night at Craftmad.  I have used Stampin Up card and papers from a set I won a couple of years ago...so thinking the papers are all out of date now.... not sure of the names.  The tab and the stitching sticker along the bottom were all part of the set.


This is the inside...   We all fit nicely the four of us.  Sorry I have add a bit of graffiti to the inside.  Partly because it was fun doodling over my siblings the other I haven't asked if they minded me showing them off. :-)
I have used varies layers of the Stampin Up card and paper for the inside of this card.  Added the photos and then finished with the little 'photo turns, or book turns, or turn mounts.  Whatever you call them....they are just what you need for the Embellish It Challenge over at Stamping Vacation.


Here is the front again.

The next Craftmad Create and Chat night is coming up on the Friday, 4th March.  Yes, we all join in the Craftmad chatroom and either Kerry or Kaye talk us through a wonderful creation.   This time it is a Star Book...you can find the materials you will need here and times.

I would like to enter into the following challenges:

Wednesday, February 23, 2011

Craftmad February Card Swap


Back again with my second card for my Craftmad partner.
We had to swap two cards this month using the Craftmad February Sketch Challenge.
My other card is the chicken card I posted on Sunday.

This time I dug out this lovely Stampin Up design paper ..... sorry don't know the name and then matched it up with matching Stampin Up card.
I embossed each top panel with a flower from the 'Stylised Flower' embossing plate.
Finished with a bling in the centre of each.
Then I went around the edge of the second panel with my fine tip black pen, drawing lots of little dashes.
My ribbon is from Secret Santa at Christmas Time....thought it looked very countryish.
I used a greeting rub on on white card and then backed with the yellow card.  
Attached a twine bow.
Sentiment says :   BEST WISHES for today & every day.

Tuesday, February 22, 2011

Stamping Vacation DT Card - When I Grow Up Challenge - Mailman


Finally, I have made my DT card for Stamping Vacations - When I Grow Up Challenge which asks us to use the Mailman theme.   This opens up lots of options, could be a image of a mailman, postage stamps, envelopes, handwritten letters.

So this is my take.  I have used a matching set of papers I have collected from a magazine giveaway.  I like the country feel to them.  I used my sewing machine and stitched around each panel.  Coloured in the lovely Penny Black Hedgehog stamp I won at Christmas time.  Now I thought this stamp would be very limiting as he is holding holly.  Thanks to Kathy who sent this stamp to me from over at The Daily Marker....as she showed how you can just ink up the hedgehog and have him carry other items.  Now an unlimited stamp.
Someone had sent me a little green envelope shape that they had cut with a die.  So glued it all together and it was the perfect size for this little guy to carry.  Found a little scrap piece of design paper from Stampin Up.  Then got out my Just Rite letter stamps and made up the 'Thanks Mum' stamp.  Next I printed off the 'Happy Mother's Day' banner.  The card needed a little more...so I dug around and found these wonderful wood heart shapes.  I coloured the edges of them with my red pen then glued the top and dipped them in red glitter.  
So much fun....now I can't wait to play with glitter again.


Monday, February 21, 2011

Sticky Situation Challenge DT Card - Four Leaf Clover Stickers


I was getting a bit worried about what I was going to create for this DT card for the Sticky Situation Challenge over at Stamping Vacation this month.  Denise has asked us to use 'four leaf clover' stickers.
After much searching through my collection and through some shops I was lucky enough to find this sticker in my stash at the last moment.  
Now I look at it I realise that it is only a three leaf clover.
Can't be too choosy hey!

I have decided to give this card to my SIL whose birthday happens to be on St Patty's Day.
I embossed some metallic gold paper with my 'Victoria' embossing folder. Then added this fabulous green textured paper which has a lovely gold fleck through it.  Added a gold Happy Birthday sticker from Sticker Store and two little clover brads.  Then finished the card by adding my one and only clover sticker. :-)

Now it is your turn.  I would so love to see what four leaf clover stickers you can come up with.


This is the sticker up close and personal.


I did have something in mind if I didn't find a clover sticker and so had to put it into action.
I have used my scalloped edged spellbinder to cut the largest circle from this lovely bazzill bling.  Then found in my stash this pre-cut green label.  Dug out my gold hearts from the $2 store and placed them in the shape of a clover.  Went around the edge with my fine black pen with small dashes and added a stem to the clover.  Tied a bow in this lovely gold edged ribbon.  Finished with a gold 'Good Luck' sticker from Sticker Store and three little green bling.
Really love how this turned out.

So if you don't have a four leaf clover sticker in you collection lets see how creative you can be with your other stickers to make them fit the theme.

Or prize this month over at Stamping Vacation (drawn 1st March) is a $25.00 gift certificate to the store of the winner's choice.  Yes, you get to choose where to spend the money.
You have to be in it to win it. :-)

Now if this is not the challenge for you there are another 29 challenges over at Stamping Vacation to choose from.

I would like to enter into the following challenges:

Sunday, February 20, 2011

Stamping Vacation DT Card - Fountain of Youth Challenge - Birds, Nest, Eggs


This is my DT card for Stamping Vacations - Fountain of Youth Challenge using Birds, Nests or Eggs.
I have used the Craftmad February Sketch Challenge to get me started on this card too.
I have coloured the images with my water colour pencils and gold metallic pen.  
I started with a orange base card then used this bright and cheery paper I had in my collection.
Found some card that matched the spots well and adhered that to the back of the image.  
Placed some Stampin Up grossgrain ribbon down the side of the card.  
Then layered up the rub-on greeting which says. "May your day be filled with joy".

Can't wait to see your creations.
Remember to go to Stamping Vacation and add them to the "inlinkz tool".
This will put you in the running for this months prize drawn 1st March which is a $25.00 Gift Certificate to the store of your choice. :-)

While there check out the 29 other challenges available.

This card is now on it's way to my February card swap partner over at Craftmad.
Our swap this month asked for two cards made using the Craftmad February Card Sketch.

I would like to enter into these challenges too:


Friday, February 18, 2011

Cardmadfairy's Digi Days Challenge - Distressing - DT Card


This is my DT card for Cardmadfairy's Digi Days Challenge.....this fortnight it is all about DISTRESSING.  Not something I have done a lot of but get a real satisfaction when I do do it.  I have used Cardmadfairy's wonderful Sleepy Morris for this creation.  I made this for my Penpals daughter whose birthday was on Tuesday and I know she loves cats.  I made a Joy Fold card using Stampin Up papers and card.  I stitched all the paper panels onto the card.  To distress the edges I dug out my scissors and dragged the blade along the edge of the paper.  I coloured Sleepy Morris with my water colour pencils and aquamarkers.  Found three buttons to glue in the bottom corner.  Also parted with some of this beautiful lace I have been saving for just the right occasion. 

So come on over to Cardmadfairy's Digi Days Challenge and add your creation so that I can visit and be inspired to try more distressing.  :-)
Remember you must include a digi image and only two entries per person.
Challenge closes 4th March.


Challenges....Lists....just what I have been looking for.


Check out this fantastic blog called Feline Playful.  The Creators name is Karen and she has team of wonderful people that list challenges each day.....the best bit they even list what you theme the challenge is about.

But there is more.......they then have a 'Winners' section where they take the time to list the winner of each previous challenge they have listed.

Is that amazing or what.

Ok, I am off to check this blog out more.

Thursday, February 17, 2011

Craftmad February Sketch Card Challenge


Hi everyone, I have been itching to have a try at this month's Card Sketch Challenge over at Craftmad.  A lot of the Craftmad members have already made creations with this sketch and posted them here in the gallery...they are very inspiring.  Be sure to check them out.

I have also wanted to try out the Stamping Vacations - Monochromatic Colours Challenge which this month is Purple.  A colour I love to use. :-)

I started with Stampin Up Card from the Bold Brights collection.  Next was a layer of KaiserCraft Paper  then layered up squares of purple papers.  I then stamped up some white paper flower with the word stamps from my Stampin Up Priceless stamp set.  Added a purple button to the centre of each which I have stitched some purple thread through.  I punched out the purple oval and topped it with the lovely white 'Thank You' Sticker from Sticker Store.  Finished with a recycled ribbon....this has been cut from the shoulder of a new shirt.  Those annoying ribbons they attach so that the shirts can be hung on coat hangers beautifully and stick out when you wear them.

I would also like to enter these couple of challenges:


Wednesday, February 16, 2011

Flowerpot Get Well


I have made this card for my Mother In Law as I really wanted to send her some flowers but I would like them to last.  A week and a bit ago MIL was rushed to hospitalat 4.30am  in a lot of pain.  Turns out she had an infected gall bladder which antibiotics eventually fixed and a week stay in hospital.  Now she is home and on a very bland diet....no fats at all until her op to remove the gall bladder in April.

I haven't made one of these cards for a long time now and had a great time putting it all together.  The pot is made from a corrugated metallic card.  I wrapped the top in the lovely satin edge cream ribbon and added a little dragonfly charm.  


The flowers I have attached to a tab that slips into the pot so you can write a message on it.  I punched out large retro flowers for a lovely pink patterned paper.  Then layered this with pink and cream paper flowers all held together with cream brads.


I made this special stand and attached it to the rear of the card so that the card can sit up on display.

I would like to enter into these challenges:


Tuesday, February 15, 2011

Cake Easel Card


Morning everyone.....I spied a tutorial for this card over at Stempeleinmaleins and thought I must try.  My very good friend in New Zealand is having her birthday this Friday, 18th February.  So a perfect chance to try it out.
So I dragged out some papers and card that I had won a little while a go at a Stampin Up day.  I think they are older colours as they don't quite match what I have in my collection.  Pretty all the same, just can't tell you their names.
The front of the card I embossed with my Victoria embossing folder.  Sticker flowers with bling.  My friend is always up for a little fun and although this lady in the image doesn't look like her what she is doing looks something my friend would do on her birthday.  I found this terrific 'free' image at Beccy's Place called Nell on Bicycle.  I coloured her with my watercolour pencils and then added some Kindy Glitz to the dress and hat.  Oh and I tried a little thing that I saw over at Alice's (Little) Wonderland.  This is where she inked random stamps around the edge of the original image to make it pop.  


Now isn't this such a fun card.  I just loved the fact that I could send my friend a birthday cake.  Yes, thanks to the tutorial, I have made the cake and the little candle box from scratch.  I have had this wonderful Pearl Touch in my collection for ages and spied it.  Lucky as it was the perfect match for the colours I was using and I think looks like icing on a cake.  Some more little punched flowers and bling.


Now this is the lovely purse and tissue holder that I was lucky enough to win in Cathy's auction she had to raise money for the Queensland Funds.  Cathy raised an amazing $165......well done.  Such beautiful and neat sewing.  These are now jettsetting their way over to NZ too.


I am such a lucky person.   The beautiful Gail from Gail's Crafty Goings On sent me this wonderful pack of goodies.  :-)  This was a prize for being the one the that has commented most on her blog.  Well what can I say.....I just love visiting her blog and seeing her wonderful creations...they all deserve a comment. Thanks so much Gail.  There are lots of papers to play with.  A sheet of Acetate with flourishes on ..... bottom right.  I have never seen these before but really look forward to using them.  Something else I haven't seen befor eare the strips of maroon, green, and yellow papers with gold design and bling that look like ribbon.  I think they will be great on a card too.

Wishing you all a terrific Tuesday.

Oh....I will enter my card above into the following challenges:


Monday, February 14, 2011

Desk Calendar Pages


1
Here I am at the end of the year with my Desk Calendar.  So much fun.
This little mushroom stamp I was lucky enough to win in a prize.  It is so perfect for paper piecing.  I have used lots of my Stampin Up design papers.  I coloured the little mushrooms with my Stampin Up pen.  Finished the page with these just perfect square gloss stickers.


2
And here is the last Tilda image that the wonderful Stacie sent me to colour in.  I am sure that this is called Aussie Tilda.  I have coloured her with my water colour pencils and tried to give her a safari look with a little feminity(sp)  Dug through my stickers again to finish off the page and found all these wonderful bugs and a terrific skeleton leaf sticker.

3
This is another prize I was so lucky to win at Christmas time.   As we were away over Christmas I did not get him until we returned in January so I was very happy to have an excuse to use him.  I won this wonderful stamp from the very talented Kathy over at The Daily Marker.....please click this link if you want to see him coloured beautifully.   For some reason the light in this photo has a pinkish tone to it....sorry!  I have coloured the hedgehog with my water colour pencils and the leaves have been paper pieced.  I gave him some glittery snow to dance around in.  

Thanks for all the lovely comments on my Desk Calendar.  I really did have a fun time putting it together.  May just have to do another at the end of this year. :-)
Have a great Monday everyone.

I am entering into the following challenges:


Sunday, February 13, 2011

Two Awards


I received this beautiful award from Stacie  (All Things Crafty) a little while back.  Sorry to take so long posting it Stacie, just taken me a while to catch up.  I love going to Stacie's blog and seeing her latest creations and lately Stacie has started posting photos of things she cooks every Tuesday with a link to recipes.  Oh so Yum!!!!  Thanks Stacie for this lovely award.  If you are a follower of my blog please feel  free to add this to your blog....there are too many 'Magical Blogs' that I visit to list.


I was given this award this morning by the lovely Linby.  Linby always has wonderful creations to share and often a lovely story to go with them.  Thanks so much Linby, award accepted. :-)

Now as part of the conditions of this award I am to TAG another 3 to 5 bloggers to participate.

This is very apt as yesterday I really wanted to share a couple of new blogs on the block who have been started by friends of mine.  A couple others that I have been visiting a while but always have lovely creations.  So I hope you take the time to visit them.


So ladies you have been TAGGED. Want to participate? Then create a post where you post the 'LOVE BLOG' image. You should also blog the persons link that gave you the award and inform her/him that you accept the award. You can then choose 3 - 5 favourite blogs which you also link in your post, then each blogger will inform you that they have been tagged.....
I hope you will accept this award....


Friday, February 11, 2011

Desk Calendar Pages


1

Back to the Desk Calendar Pages....you can see more here and here.

This is another wonderful Tilda stamped image that I received from friend Stacie.  I used my watercolour pencils and Copic Ciao E51 on the skin.  Finally I found a use for these lovely buttons embellishments that I received years ago in a prize when I first joined Craftmad.

2

Now this is one of my favourites.  I so love the colours and the image is a digital stamp from over at Cardmadfairy Creations called Flower 1.
I paper pieced the flowers and added a brad to the centre.  Coloured the stems and leaves with my Stampin Up pen and a touch of gold.  Finished the page with some paper piercing.
Oh can't forget the two little cute clear and sparkly butterflies stickers from Sticker Store.

3

Now I know that you have seen this one but I wanted to keep all the pages together.
I created this page using Lulu one of Cardmadfairy's newest digital stamps.
This was my creation for the Design Team over at Cardmadfairy's Digi Days 1st ever challenge - Romance.
I have paper pieced her dress with a piece of paper that I marbled years and years ago.  I made a frame for her and added some Kindy Glitz.  Finished the card with star stickers and bling also this beautiful ribbon that I received from my Secret Santa.

I would like to enter these challenges.


Thursday, February 10, 2011

Quick Thank You


I made this quick thank you card up for my friend Cathy.  Decided to have a go at the Clean and Simple challenge over at Stamping Vacation.  The challenge this month is to use 1 sentiment, 2 pearls, a border and oval panel.  I also attached this lovely fairy tag I have collected from a magazine at sometime.

Just an update on the happenings over at Stamping Vacation.
Very exciting...... we reached 300 followers and JANET BEREZOWECK was the lucky winner of $20.00 gift certificate.

Now this means we are now on the way to 400 followers and the terrific Denise has put up another $20.00 gift certificate prize for one lucky follower when we reach 400.  Good luck everyone. :-)

ARDILLA was the winner of the February Prize.....thanks everyone for take part in all the wonderful challenges.

Our prize for March drawn 31st March is:

 a $25.00 gift certificate to the place of the winner's choice! So get your entries in! Remember you can enter any challenge as many times as you like and as many challenges as you like! Have fun! 

Wednesday, February 9, 2011

Desk Calendar Pages


1

Three more Desk Calendar pages for you today.....these were for my January Swap over at Craftmad.  You can find more pages here.

Now my daughter was looking over my shoulder while I was creating these pages and was loving how the papers looked so good on the images.   So I asked her to pick an image for me.....which is this cute bear and mouse a free digital from Beccy's Place.  Next I asked my daughter to pick out papers to use.  Now they are not what I would have chosen but it has turned out lovely.  e.g. I would never have chosen this spotty paper for the flower.   I have coloured the bear and mouse with my watercolour pencils.  Finished the card with some paper piercing.
So this page is paper pieced and pierece. :-)


2

For may I have used another wonderful image drawn by Ruth over at Passion for Stamps called Pip Hangin' Out.  I have paper pieced his jumper and pants.....I used my white gel pen to add the dots across the middle of the jumper.  Coloured the remainder of him with my watercolour pencils and Copic Ciao E51.  I added some Faux stitching to each side of the image by piercing the paper and then joining the holes with my metallic pen.  To finish I added a few star stickers.


3

This is the one and only Tilda I own.  I so love how she has turned out with the paper piecing...I think it really makes her dress come to life.  The papers are all Stampin Up.  I have again used my watercolour pencils on her hair and Copic Ciao E51 on her skin.  Finished the page off with flower rub ons and bling.

I would love to enter these cards into the following challenges.


Tuesday, February 8, 2011

Desk Calendar Pages


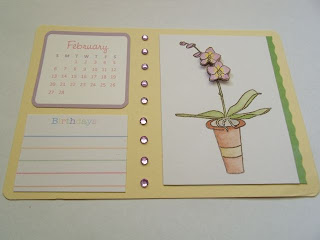
Our swap project for December/January over at Craftmad was a desk calendar.  It took me a long time to come up with a plan until I saw what one of our new members at Craftmad had made for her swap partner.  Yes, I was inspired.  Zena made a page for each month using a different technique.  You can see her calendar here.
I have been wanting to try paper piecing and thought what a better time....now I can use all my stamps.

So I will show you three at a time.  

To start I found these wonderful months already to print.....thought I had kept the blog....if you know who they belong to please let me know as I would like to acknowledge them.
Next out came my Stampin Up card as it seemed to match the tone of that the months were printed in. 
I created the 'Birthday's' tag myself and printed out.  
Then came the stamps...some digital and other rubber.

January I have used the wonderful Sparkle N Sprinkle Stamp....Dani's Swing.  
I have gone through my scraps and found appropriate papers to cut out and paper piece this image.
I have used my watercolour pencils on the vine and top flowers also my copic ciao on the body parts.
Finished the page with three star stickers and bling.


I so love the end result of this image.  
I stamped the image twice onto white card.  Coloured both with my watercolour pencils.  Then cut out the flowers from the second image and layered up with 3D Foam.  
Finished the page off with a line of bling.
My resolution for this year....to use more bling rather than keeping it because I love it. :-)


This fantastic image arrived as I was searching for more images for my calendar from my wonderful friend Stacie.
As this was already stamped I couldn't paper piece it so I have just coloured it with my watercolour pencils.  I added the word 'smile' with rub on letters.  Then finished the page with more rub on flowers and bling.

I would like to enter these into the following challenges.


Cyclone Yasi Photos

Our days with Yasi


Tuesday it was clean up day....so every thing not required went away.....everything here has been moved to our shed.


I mowed on the Monday....thinking if the cyclone did come in with all the rain it is one less thing we have to worry about.......so before.


After..... this shows how high cyclone Yasi was......which made us so lucky.  He was gusting in the tree tops....if that had been a couple metres lower there would have been all sorts of damage.  It was a roar that you could hear come for what seemed like forever and then you would see tree tops move in the distance.  You could watch as they swirled around and came straight for the house. 
This mess still took as a long while to clean up as there are lots of small branches in there that you can't just run over with the mower but were too small and too many to simply pick up by hand.  So lots of raking.


Monday and nicely mowed....a hint that the cyclone is coming but thinking....they always downgrade and turn into a rain depression.


Thursday morning....nup...this one kept on coming through and amazingly kept going across the land as a catergory 3, then 2 then 1 and took forever to turn into a rain depression.  Scary stuff.


Monday arvo......all tidy except for my overgrown vegi patch near the tied down boat.


Thursday morning out checking out the damage.  This is where we had most of our work.  Seems like the winds got trapped in here.


Boat was going nowhere....same type of tying down on the front end too.


Our accommodation in the bathroom between 11pm and 2am.....Wednesday night Thursday morning.  Yes, dog came with us too and thought he was in heaven sleeping with the humans. :-)  Amazing how bright the flash is on the camera .....we had no power and had one little 'ole torch for light.  No one was too impressed me taking these photos about 1.30am.  I was fidgety.


Bathroom looking out to laundry where hubby was bunkered down.


Yasi literally ripped branches from trees.


Just shows how anything can become a weapon during the winds.   This is one of the stands of leaf from a palm frond which has pierced the leaf on the ground.   Shows why everything has to be tied down or put away prior to a cyclone.


Our lights for 2 1/2 days......no power.
Amazingly how fast ERGON our electricity provider got or is getting everyone back on.  They are doing the most amazing job.
No landline or mobile phones for half a day on the Saturday.


Good parts of a cyclone.....our seasonal creek which most of the year is bone dry is a little oasis for us.  
We are all having a bit of down time and cooling down from all the heat and humidity after a morning of work and no power.  When we get really good rain which is often at this time of year the creek would be up over our heads....thankfully it flows so well that it goes down most times in about and hour.


Our DD is standing at the end of the easement which runs along the back of our property and into the creek.


A view down to the bridge on the street.


Water coming the other way.....the water here is about 1.5 metres deep....which amazes me since most of the time it is bone dry.....so that is so much water.


Our son....didn't want wet clothes again....


The easement....along the right top edge you can see bundles of sticks...this is the debris that comes down from other properties behind us.  Amazing how much we have to clean up everytime it flows.  I think people forget where the water goes.


A bit hard to see but another fun thing has been found whilst cleaning up after the cyclone.  
Our DD has discovered a vine swing that holds her weight....I am sure she will spend many quiet minutes up there in the future.


Thankfully our council automatically comes and picks up all our green rubbish.  We just leave it pile neatly and high out  near the street but out of the drains.  This is our first pile.


Second pile.
Collections start on Wednesday (tomorrow).

In summary.....this was indeed a scary cyclone.  It was just as scary waiting for the cyclone to arrive and seeing at some stages that it was heading directly for us....as scary as the winds at the peak of the cyclone.  Thankfully, for us we are all safe and no damage at all to our house.  
The clean up and power outage was just inconvenient as too will be the lack of food on the shelves at the shops.
The debris and mess is really nothing compared to what we had in Cyclone Larry five years ago.
Now as I sit here with family and friends safe, power, sunshine, and a house, I appreciate how lucky we were and feel for the people an hour south of us that are still trying to get to their houses.

Take care everyone.
Crafting coming from now on. :-)

LinkWithin

Related Posts with Thumbnails