Tuesday, January 31, 2012

Wish you were here.....


A quick card today.  My Mum gave me these chipboard stickers that were part of a giveaway for the Cardmaking and Papercraft Magazine.  I have teamed them up with the lovely bright blue card stock and striped paper that I have had in my collection forever.  A strip of yellow card cut with a wavy edged blade.  The checked paper is from my DCWV Adhesive Patterned Paper Pad.  Finished with a touch of yellow ribbon from Blue Edge Crafts.

Have a great day everyone, I must dash.....busy, busy, busy. :-)

Monday, January 30, 2012

A first for me.....a Scrap Page


Morning all, yes, something new from me. :-)
For a few years now Kaye has been posting a challenge sketch page up each month at Craftmad.
Each year I think I should use these to get some memorable photo moments of our life sorted.
Well, this is the year.  I have decided since our son has now finished school and that was 12 years of his life this fits neatly into the 12 sketches Kaye will share with us this year.  Check out the album for this months sketch challenges at Craftmad.

I turned the sketch sideways and the paper I have used is 'Far and Away - All Aboard'.
I then printed out this photo of our son on his first day of school which I have done each year.
Although, this year, I forgot to take my daughters first day of year 11 and I don't think she will let me forget that.  Also that fact that I didn't even think to get any lunch ready for her. She was feeling really loved. :-)
Back to the page I layered the photo up with some blue and green textured paper from a DCWV pad.  The swirly black border is Bazzill Basics - Just the Edge die cut borders form Blue Edge Crafts.  Also added some star brads to this border.  2002, is a rub on and I printed out the Grade 3 on to patterned paper and cut it out.  

I will add a little bit of info/journalling later to this page when I have had time to remember his teacher and maybe a few friends that year.

Oh and that is not his face.  I have decided to cover it due to hearing a couple friends comment that they are annoyed that their sister or Mum has posted a photo of them when they were much younger without their permission.  

Hope you all have a fun day planned.
Mine is not so exciting.....starting a bit of Spring cleaning of the house.  I just know I will be happier when it is done and the cobwebs are gone.

I would like to share this page on the Make it Monday challenge #74 - Always Anything Goes.

Friday, January 27, 2012

Xmas Party Time


Yes, I know scary but I have made a Christmas card. 
This year over at Craftmad we had decided to have a separate sketch each month for a Christmas card.  This way we can build up our collection and not have to panic at the end of the year.
I will either keep the ones I have done for the end of the year or donate them to the Aussie Troops serving overseas collection in October.

So I have used the sketch at Craftmad. The base card is this beautiful shade of green Linen Textured card.  I then dug out my Stampin Up (SU) Design Christmas Paper from two years ago.  The top circle topper I have used SU Cherry Cobbler and Very Vanilla.  The SU Very Vanilla I have run through my Holly embossing folder.  The circle shapes are cut out with my Spellbinder Nesties . Isn't this such a fun 3D Paper Tole image.  I am so glad to be doing Christmas cards early as I had this all layered up and ready to go but ran out of time to use her.  This is from a Sarah Kay Die Cut Sheet from over at Blue Edge Crafts.
It's a little hard to see but I have run a thin gold ribbon vertically and horizontally on the left hand side of the card.  The 'Party Time' sentiment is from a magazine giveaway which I have layered with SU Cherry Cobbler.

A fantastic Friday wish sent to you all and hope you have a terrific weekend.  See you Monday.


Thursday, January 26, 2012

Rachel's Camera Card


Today I have a special card I made for a friend of mine who just loves photography.  Since her son was born and possibly before I have not known Rachel to be far from her camera.  Lately, she has taken to photographing insects.  Amazing how pretty she can make a mere ant, fly, or moth look so good.  
So I thought a camera card was in order.  I found this wonderful tutorial at Extreme Cards and Papercrafting.  There is a print out for the camera shape but I couldn't figure out how to get my printer to do that.  So cut my own shape free hand.  I have added an embossed piece of silver cardstock for the flash. I used rub on lettering to add my friends name as if it was the camera brand name.  Instead of an 8 mega pixel camera ....I decided that the mega pixels would be her age.  Now there is a trick to the lens.  The 'Celebrate is a Just Rite Stamp.


I printed out 8 of my friends wonderful photos in a three inch size.  Following the tutorial as to which way the photos should be facing and the then folded all the papers to create this never ending photo display.  The lens area can be from each corner to reveal two photos from each corner.  This is my friend and her son.


Another corner reveals Rachel's wonderful photo of a passionfruit flower.

I will be trying this out again.  For some reason one photo appears upside down even though I followed the instructions.  I ran out of time to figure out what I was doing wrong as the card had to be in the mail yesterday.  This lot of photos is also my second attempt as my first....which was much neater...I attached one section in the wrong place and it just would not open properly.  But I got there in the end.

I hope to catch up on some blogs today.  It is Australia Day here in Australia. :-)  No huge celebration at our house.  Just enjoying the public holiday we have.
Hope everyone has a wonderful day what ever you have planned.

Tuesday, January 24, 2012

Kite Card


Well, the new school year starts today for our daughter.  Strange only sending one child off to school. Our DD starts year 11 this year so very busy times ahead of her for the next two years.  On one hand she is very excited as she finally gets to do all the subjects she enjoys and does well at.  Art, Media etc....although she has to do English and Maths.  That is how she tells it anyway. But on the other hand she realises that it's time to put in lots of hard work so would be happy to stay at home.  

On to the card.  I told you yesterday that I had discovered Qbees Quest blog with wonderful tutorials.  Yes, I have already been back and made this wonderful kite card.  I just loved the shape.
I started with some blue leather grain textured card from Blue Edge Crafts.  Then found the lovely orange strips in my scraps container.  Cut out the 'Happy Birthday' star from another pieces of scrap patterned paper.
The tail for the ribbon is a piece of string that was attached to a tag that someone kindly sent me and the little gold bows are from ribbon that was tied around our Christmas bon bons.


This is the inside of the card.  I had this wonderful fun bird patterned paper for ages.  It is a magazine giveaway and I am so glad that I have found the right card to use it on.  I printed the sentiment out on the computer. It reads " Wishing you a carefree day on your BIRTHDAY"

Off to get this day started....have a good one everyone and thanks for visiting and sharing your comments.

Monday, January 23, 2012

Are you having Comment problems?


Just saw this and thought it might help out:
Google Blogger has recently altered their “threading” causing most people to experience problems with loading the blog or leaving comments. To fix this, simply change your blog option from embedded comments to pop up comments. Here is how to do it:

1. Log in to the dashboard of your own blog.

2. Click on “Settings” and then click on “Comments.”

3.Under the “Comment Form Placement” choose “Pop-Up Window.”

This will allow users to see your blog properly and to add comments. It won’t change others blogs and what you can see or comment on, until they make the same fix. Pass the message around so that everybody can make the changes for themselves.

Pop up birthday card for my sister


Another birthday in my family. January and October seem to be the popular months for me.  Today is my sister's birthday.  So a very Happy Day wished to you Lyn. :-)

I have had an urge to try out pop up cards for a while and wanted something a little different to send to my sister.  So what better time to try a pop up card.  I found a wonderful tutorial at Qbees Quest blog.......there are so many more fun looking tutorials there too.  I shall be returning to that blog.
I even cased the front of Qbess card as I liked the whole idea.  So I have used a panel of embossed green card that I received in a swap over at Craftmad so don't know the name of the embossing folder.  Then used a variety of Stampin Up Design Papers.  Next I used my green ribbons that Santa was so clever giving me in my stocking this year....he has such taste. ;-)  The tag I cut out myself and added the gold rub on sentiment.


Here is the fun pop up in the centre of the card.  Again I have used Stampin up papers and cardstock.  Its hard to see in the photo but I coloured the candles with my Copic and then created swirls down the candle with my Colourless Blender.

Challenges:  This is my Design Team creation for the current Unstampabelles challenge - #7 Anything Goes.  Such amazing fun over at Unstampabelles this month we currently have 92 terrific entries.  Wonderful paper creations and not a stamp in sight.  Oh, and the other excitement we reached 100 followers on the weekend and a surprise prize was given to the lucky 100th follower Cheryl.
You have until the 3rd February to join in all the fun.

I would like to enter this card into the Make It Monday Challenge #73 - Always Anything Goes. 
My first time entering this weekly challenge this year.  Michelle and the Design Team always have such wonderful creations to share.  I always love visiting the many entries they have too as there is such a variety of creations shared.


Friday, January 20, 2012

Craftmad swaps received this week


Hi everyone, I just have to share the wonderful work that I have received in the mail this week.
This Rail Fence block is from Annmaree for our January Sewing Swap at Craftmad
We will be swapping three blocks for three months. Next month we are planning on swapping a Disappearing Nine block.

This is the Rail Fence block that Mandy has sent me for the swap.  Aren't the fabrics in both of these beautiful.  I can't wait now to put the quilt together and be able to sit and remember who sent what.


Kerry was my partner for the Craftmad January Card Swap and these are the wonderful cards she has sent me.  We had to swap two cards recycling something from around the house.
Kerry has used the mesh from a fruit bag on this card and the background was packaging from some stickers.


This lovely image has been paper pieced using pages from an Avon catalogue.  I really like how Kerry has used an actual hair photo for the girls hair.  The butterflies are too. cute.

If you want to see what everyone else swapped for these two swaps here is a link to the January Swap Album.


Wednesday, January 18, 2012

Flashback Friday 19.0 - Clean and Simple


Good morning to all and a special Good Evening to Janette. ;-)
I never think when I type up my blog posts about people being in other parts of the world and reading it at a different time of day.  Janette....reminded me yesterday.
It's the one chance I have of telling you the future.  See Wednesday morning will be a "Good Morning".  :-)

This card is from my second ever blog post 19th November 2008 and never received a comment.
You can see the original post here.
I am entering this into the Flashback Friday 19.0 challenge.  Amy asks us to repost our first ever Clean and Simple card that we posted on our blog.

Yes, this is very much a Stampin Up card.  Actually, everything on it is Stampin Up.

Well have a wonderful Wednesday when you get there.  
Not many plans for me yet.  Although, one is to catch up on my Doodle Calendar.
I was doing so well with this but then birthdays, job hunting, returning to school and driving lessons have seemed to gotten in the way.

Tuesday, January 17, 2012

My Brother's Birthday Card


Morning everyone, time to share my brother's birthday card.  His birthday was way back on the 7th January.  It was in the mail before his birthday but had a long way to travel so wanted to make sure he had received it first.  He does visit here from time to time.

So decided I wanted something a little different and thought I would try out a tri-fold card again.  Found these wonderful Allison Ellis papers in my collection and teamed it with the brighter blue cardstock...just to add a little fun.  I added stickers to the different frames.  The Happy Birthday stickers were from my prize pack from Michelle H.  All the other stickers are from a variety of sheets that I have had in my collection for a little while.  Also added the three square silver brads.


Here is the card all opened out.


And again from the opposite angle ...the sentiment is a rub-on.

School uniform and school book shopping for me today.  The school year starts next Tuesday for our daughter.  Much easier though as this is down to one and she is now a senior.  They only seem to use books to write notes in.  So pens and papers.
Hope you have a fun day planned.  Thanks for visiting.


Monday, January 16, 2012

January Craftmad Sewing Swap


This month at Craftmad we have decided to swap 9" blocks over three months to create a small quilt.
For a lot of us this is the first time we have done anything like this......this includes me.
I have sewn a whole bunch of squares together before to create a knee rug for our lounge room but never attempted any block patterns.

So the January swap is a Rail Fence block to three people in their favourite colour combo.
Annette was looking for greens.  
It is nice to finally use some of the fat quarters I have collected through previous swaps.


This block headed over to Cathy who asked for Autumn tones.


My third block went to the lovely Kelly who asked for a blue theme.

I had such a great time sewing all these blocks up and seeing how well the variety of fabric patterns worked together.

Can't wait till next month as we are doing a Disappearing Nine block suggested by Annmaree.
You are more than welcome to join on in next month.  I have a couple of spare blocks to catch you up.

Thursday, January 12, 2012

Happy 16th Melissa


Well the day is here....our baby girl is turning 'Sweet 16'.
This is the card I have made for her.
Dug out my Stampin Up River Rock for the base card.  A layer of Stampin Up Blush Blossom. Then this beautiful patterned paper which I think is from Kaiser Craft.  More Blush Blossom which I cut with the wavy edge cutter and the other side of the patterned paper.  The flower I have created by layering up flowers in my collection and adding the centre bling brad from Pizzazz Aplenty.  As it is for Melissa's 16th I thought I should splurge and buy a bling flourish.  Never used one before as it seems like too much 'pretty' to giveaway. :-)  Then I coloured the chipboard 16th, which by the way was the extra challenge with the Craftmad sketch.  I coloured the 16th with my Copic pens.  Finished off with the silver 'Happy Birthday stickers form Sticker Store.


Yesterday morning I made the chocolate cakes for Melissa's birthday cake.  Melissa had decided she wanted the number '16' in the same sort of font that it appears on the US college jerseys.
So I figured we would need a lot of cake for this.  Planned on making up 2 slab cakes...cooking in lamington trays and a little bit extra for a round cake to share with my parents and SIL this arvo.
So in my wisdom I decided to triple the recipe.  So glad I started with the biggest bowl I have.  As you can see things got a little messy and close to overflowing but it all turned out in the end.


Last night I went out with three lovely friends to a fantastic movie - New Years Eve.  I have never seen so many actors in one movie before......we all really enjoyed it.
When I returned home, Melissa was proudly showing me the cake she had decorated.
Yes, she has cut out the numbers by herself and added all the icing.  We had bought some black colouring and pink glitter from the Cairns Craft Centre in at the showgrounds earlier.
Sorry for the Glad Wrap all over it but I covered it so the cake wouldn't dry out in the fridge thinking Melissa would have already taken a photo.  I hope tonight we will get a better shot with candles.


I took this shot hoping you can see the pink glitter that we have added.
Yes, we can eat the glitter it is non-toxic.

Have a lovely day everyone.


Wednesday, January 11, 2012

Merry Belated Christmas


I had a bit of fun on the weekend creating two Belated Christmas cards.  So totally forgot one for my brother and his family.  Also one for his MIL....  I had to do handmade as his MIL commented on how I normally do a handmade one for her.  oops!

So I googled and found these images of santa relaxing after all his hard work.  I printed them and attached them to some green Bazzill Two Scoops (this is an embossed cardstock that can be sanded).
The base card is red Linen Textured cardstock and on top is a layer of Christmas patterned paper I have had for a long time.

On this card I added the sentiment to the image before printing it out.  Then added this wonderful light garland that I have had for a little bit.


To finish this image off I used rub ons for the sentiment and cut the three 'Party Time' circles off a giveaway sheet from a magazine.

Off to make a 16th birthday card, two cakes and a little shopping for our daughters (our baby) birthday tomorrow.

Tuesday, January 10, 2012

Doodle Calendar


I am trying something new this year.
Last year I saw the lovely calendar pages that Sharon over at Wildflowerhouse by Sharon created each month.  I will put a link to each page below so you can check out her lovely work.

Sharon found the idea here at the Kathryn Wheel blog.
At the start of each month they link up the completed page from the previous month and new page ready for the new month.

So here is my first attempt.  I have bought a large watercolour art pad as I wanted to play with my Aquamarkers and watercolour pencils.   The background I randomly painted with blue acrylic paint and then sprayed, again, randomly with my gold smooch.  Couldn't think of what to draw around the edge so went to the trust flowers.  Added the January title.

So I hope to be back at the end of the month with a little picture for each day.
Oh by the way.... please do not expect any great artwork.  All just a quick doodle. :-)

Sharon's Calendar
and the start of October 2011

Thanks for visiting and leaving your lovely comments.

Monday, January 9, 2012

Craftmad January Swap Card No 2. - Recycle


January's Card Swap theme over at Craftmad was to recycle.
My daughter and I had been admiring the leftover pieces of our bon bons this year.  Yes, we splurged a little so we could get decent prizes. :-)  My daughter had picked off all the little oranges gems that were on the gold bons bons.  They are safely tucked away for later use.  I thought the rest would be perfect for my two swap cards.


The first card I created was an iris folded VW.  I decided it needed a background and found just the right scene on some scrapbook paper I have.  I printed the VW image on the back of the paper, cut this out and then proceed to add the black and gold strips I had cut from the bon bons.  Using the pattern from here.   I then used my Spellbinders to cut out circles for the wheels.  Finished off with a gold 'Congratulations' sticker from the Sticker Store.


The second card I have used the bonbons as centres for the paper towel flowers I created with my Spellbinders.
The embossed background I received from the lovely Kaye in a swap we had at Craftmad last year.
I cut out a strip of black card stock using the wavy edge blade on my cutter and added this wonderful gold 'Happy Birthday' sticker from Sticker Store.
The cute little hedgehog I so love to colour is a Penny Black stamp called 'A Thorny Affair'.
I have actually stamped him with my black Memento Ink on to new 'Bleed Proof Paper' that is available at Blue Edge Crafts.  At first I thought that this paper would be way too thin (75gsm) but the image coloured up beautifully and at $1.75 for 10 sheets (A4) that is a bargain.  I used my Copics and probably went over most areas at least three times.  No pilling or tearing.  As you can see he cut out very nicely too.

Well that is it from me.  I am enjoying an hour to myself.  First time for a what seems a long long time.  Our son finished school 18th November last year, and daughter the following week.  Our daughter doesn't return to school until the 24th January....although that is coming up fast.   With Christmas and New Years my husband has had a lot of time off work.  So there has been someone here most of the time.

Take care and enjoy your day.  I will. :-)


Friday, January 6, 2012

More Bamboo Talk

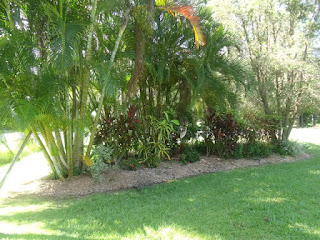
You will be pleased to know that we are almost to the end of our bamboo saga.  What will I have to talk about then......  :-)  Yesterday, I cleared away the last of our bamboo mulch.  The gardens are all done, even the vegi garden and the bamboo garden.  Two gardens that I have never mulched before.  Also four special trees around the yard. (I think they feel special as they now are mulched another first) Here are some photos to show you what things look like now.

PLEASE CLICK ON THE PHOTOS TO SEE A LARGER SIZE.

Just a reminder photo first....the pile of mulched up bamboo.

Our Bamboo garden just after we had finished chopping all the dead branches down.


The bamboo mulch pile as I finished off yesterday morning.

Another view of the mulch yesterday morning.

The amazing view yesterday evening when I had scraped the last shovel full of bamboo mulch.


The bamboo garden as it looks today.

The opposite side of bamboo garden.

The back view of bamboo garden.  Best thing is I rediscovered the stepping stones that my kids and my Dad made all the way back in 2004.  Great memories.

Just showing off the other mulched gardens.  All of which are looking wonderful at the moment due to the rain.  We are in the wet season.....high temps, high humidity and high rainfall.  Although, today seems perfect at present sitting the house with a temp of 25C.

Garden nearest the mulch pile.

Another front garden.

So now we will work on removing more of the bamboo clump that remains.  That will be a 'slowly does it' project.  Since the bamboo had died most of those stems remaining pull out with very little effort.  So it is just a matter of time.

Thanks so much for listening to our bamboo dramas.
Have a wonderful day whatever you have planned.


Wednesday, January 4, 2012

3D Paper Tole Lily Buckle Cards


Was a bit busy yesterday helping our 17yo son hand out his resumes.  Yes, the fun task of job hunting. If anyone in the Cairns area is looking for a keen, Year 12 school leaver please email me.  Keen to do most types of work except for Sales and Front Counter.  Thanks.

Okay, back to crafting.  I received a lovely Christmas card from Mandy at Craftmad and it was in the style of a buckle card (tutorial here at Craftmad).  I haven't done one in ages.  So dug out papers etc and created two.

I started with Grey Linen Textured Card for the base.  The front left I have added a silver metallic paper and this wonderful Lily 3D Paper Tole.  To the right inside section of the card I have added matching purple glitter paper.  I then finished the buckle off with a silver 'Best Wishes' sticker and added three purple bling.


The second card I have used another 3D Lily Paper Tole from the same sheet as above.
Then reveresed where I added the background papers too.


I received my prize from Amy at Flashback Friday Challenge.  (Sponsor:-  Mary Dawn of a . muse)
How exciting....I so receiving parcels in the mail.  Thanks so much Amy, I can't wait to have a play with these new stamps.
Everyone be sure to check out Flashback Friday on 6th January when the new challenge will be posted.  I will be there.

Well thats it for me today.  Hope you have a good one.  I am waiting to see what the weather is doing to see what I am doing.


Tuesday, January 3, 2012

Crafty Linby - Blog Candy


Linby has decided to have her first ever Blog Candy.
I love visiting her blog each day and seeing what wonderful creation she has.
How could I not enter....especially when I spied amongst the stamps in the giveaway and special stamp that I know a friend of mine would so love.
So visit Linby's blog for your chance in the candy.
Closes 4th February.

Husbands Birthday Card


Morning everyone, today I am sharing the very quick card that I made for my husband 11pm NewYears Eve.  His birthday is News Day and luckily for me he had to go out and pick up our son.  
So I quickly grabbed a blank white card and rounded the corners.  Grabbed my Stamp In Brights folder and chose three colours which I new would go together....best thing about the Stampin Up range.
I have layered up Old Olive, Rich Razzleberry and Tempting Turquoise.  The Tempting Turquoise I ran through my Happy Birthday Cuttlebug folder then added these fantastic vellum stickers.  Had them for ages, should have used them sooner.  I just love the glow on the balloons.  Finished with the gold sticker Happy Birthday down the side.

My hubby's birthday always seems back to front.  He is wished Happy Birthday at the end of the party, gifts are given then we all go to bed. :-)  Awake many hours later to have lunch and birthday cake.

I would also like to share with you the lovely prize pack I won from Michelle H.
This was a surprise as I had commented on one of her wonderful projects not realising I had entered and giveaway.  I am happy though.....lots of fun things to use.  Thanks so much Michelle.


Have a terrific day.  Today is my friend Anita's birthday, no card to share for her yet as she is over in Hawaii....so can't spoil the surprise.


Monday, January 2, 2012

Unstampabelles #7 - Anything Goes


Happy New Year
2012
is here!

We have a new challenge happening over at Unstampabelles.

We thought we would make it a little easier to enter after all the running around for Christmas and the New Year. 
Also this should give everyone a chance to show off all their wonderful techniques.

Please offer a warm welcome to our new Design Team members  JanRMonicaBeth and Susan.   I am sure they will inspire you with their wonderful creations each month.

You can enter any form of paper creation as long as NO STAMPS have been used (this includes sentiments).

IDEAS: quilling, parchment, stickers, boxes, books, cards, scrap pages, etc

Our sponsor this month is me - Merry. :-)

I have tried to put together an 'ANYTHING GOES' prize pack.

This includes: 15 Origami Papers and patterns, purple patterned Washi Tape, double sided tape from Sellotape (12mm x 10m) and three Copic Pens - YR07, Y06 and R27.


Now it is time for my Design Team creation.

I have made a Book Box and you can find the tutorial Stempeleinmaleins

I used Pink Linen Textured Cardstock for the base and wonderful patterned paper....sorry I don't remember the name.  I added the 'Just Because' rub-on.

Top View

Inside I have added eight small gift cards.  I used the computer to create a contents list....just like a book.  I listed each card and what it is for e.g. Thanks, Birthday etc.

The back.

These are the little gift cards I added to the Book Box.  Each of these cards have been created with card stock and stickers from my collection.  I do love the orchid stickers which someone kindly gave to me at some stage.

Well now it is your turn.  I hope to see you soon over at Unstampabelles.


LinkWithin

Related Posts with Thumbnails